 UniFi
UniFi Omada
Omada UISP
UISP
There will be times when you need to reset your Omada devices to factory defaults:
- You have purchased a second hand device. A factory reset should always be done in this case before it is deployed
- Your device was previously adopted but you don't know the credentials
- A failed upgrade has rendered the device inoperable, usually because the power blinked during the upgrade process
- Device is misbehaving
- You are moving the device to a new customer/site/controller, sometimes easier to just hit that reset button
- You just want a fresh start
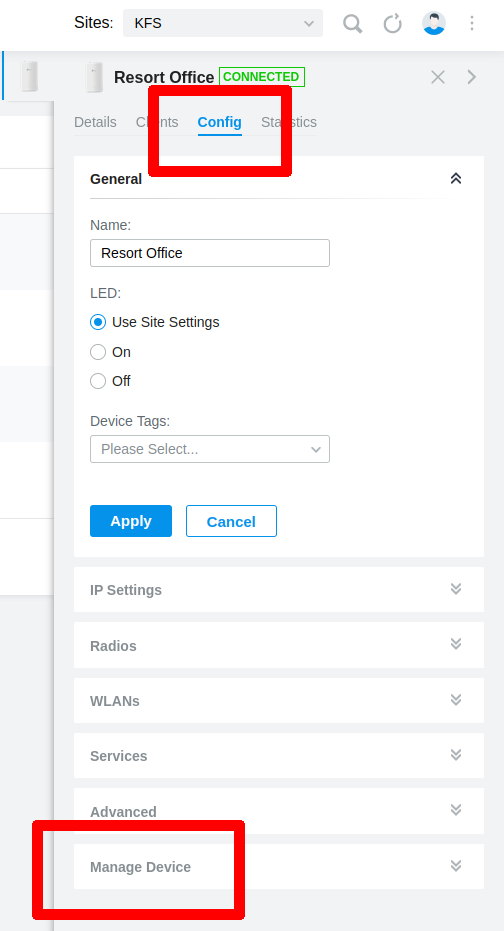
Method 1 - Unmanage via Omada Controller
For devices adopted by your Omada controller, all you need to do is select the device in the device list, click 'Config', then click 'Manage Device', followed by 'Forget', like so. . .
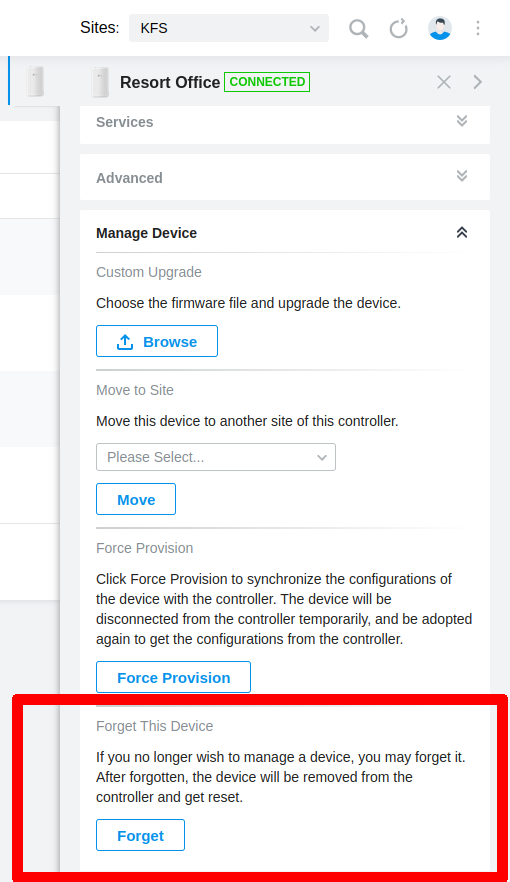
The device will immediately clear down it's configuration file, reset, power cycle, and return to it's factory state. Be sure to leave it powered for a few minutes so it can complete the process or you risk damaging the firmware.
Method 2 - Paperclip
All Omada devices have a tiny button hidden under the cover, or somewhere else on the device, it's not hard to find, a small hole usually one or two millimeters in size, just enough for a paperclip, or something similar. Example pictured below is an EAP-235-Wall AP. . .

With the device powered ON, press and hold the button inside the hole for 5 or 6 seconds, wait for the status light to change color or flash, and then release.
Be sure to leave the device powered on for a few minutes to complete the reset process, otherwise you risk damaging the device firmware. Once the device has fully rebooted, it should be in it's factory state but if not, just try again, sometimes you may have released the button too early without realizing.