 UniFi
UniFi Omada
Omada UISP
UISP
This page assumes you have already set up a site in your Hubox Omada Controller and have connected and powered up the device or devices to be adopted. We will also make the assumption that the device is in a factory defaulted state.
If the device requires defaulting, this can be accomplished with a paper clip and a ten second press of the reset button (while the device is powered).
Important note for those accustomed to the Ubiquiti Unifi ecosystem: The key difference with Omada devices is their ‘standalone’ mode. Once adopted to a controller, they lose standalone functionality and are limited to the feature set within Omada.
As Hubox will be a Layer-3 controller (i.e. not on your own network), the only methods of adoption are detailed below. All other adoption methods you may have read online can be ignored.
There is not net difference in the end result whichever method you use. All will result in your device being adopted by the Hubox controller. Use whichever you find easiest. Not all platforms support the discovery utility, but the 'Standalone' method (i.e. the first one listed below) will work on any platform. . .
Layer-3 Adoption via Standalone GUI
Command line adoption is currently not supported in the same way as the ‘set-inform’ command in the Unifi ecosystem, Instead, Omada devices are initially configured as ‘stand alone’ devices with a GUI, which can be accessed directly, where you will set the Hubox controller hostname or IP.
Identify your device on the network. You can obtain it’s IP in a number of ways. Easiest is to allow your DHCP server to assign an IP automatically. Logging into your gateway and reading through the DHCP assignments should lead you to the device’s IP. . .
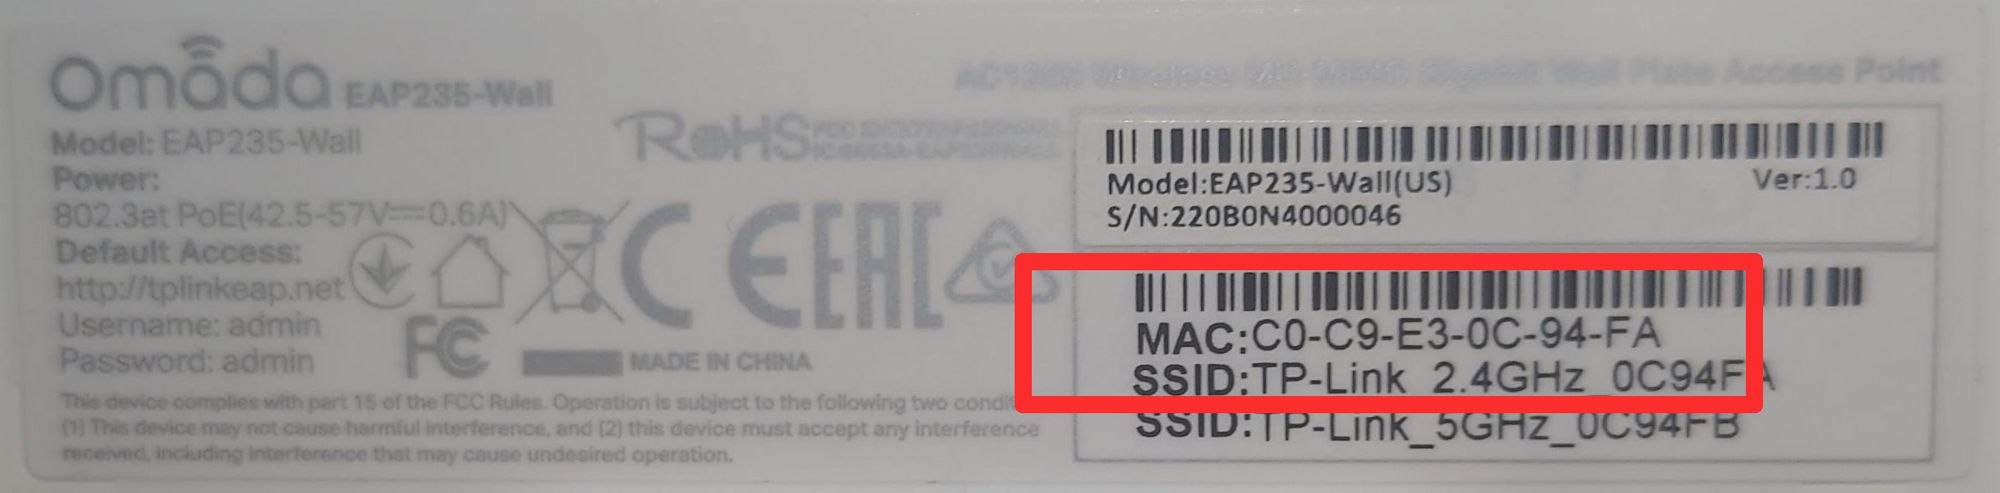
Using this IP in any browser will take you to the device’s ‘standalone’ user interface. You should be able to connect to the device over wired network, OR via the temporary passwordless WiFi signal the device will be broadcasting (assuming it is in it’s default state)
TP-Link also states that when connecting to the device via it's WiFi signal, you can access the device at tplinkeap.net but we have found this to be hit and miss as it relies on the device's own DNS resolution. Using the device's IP is more reliable.
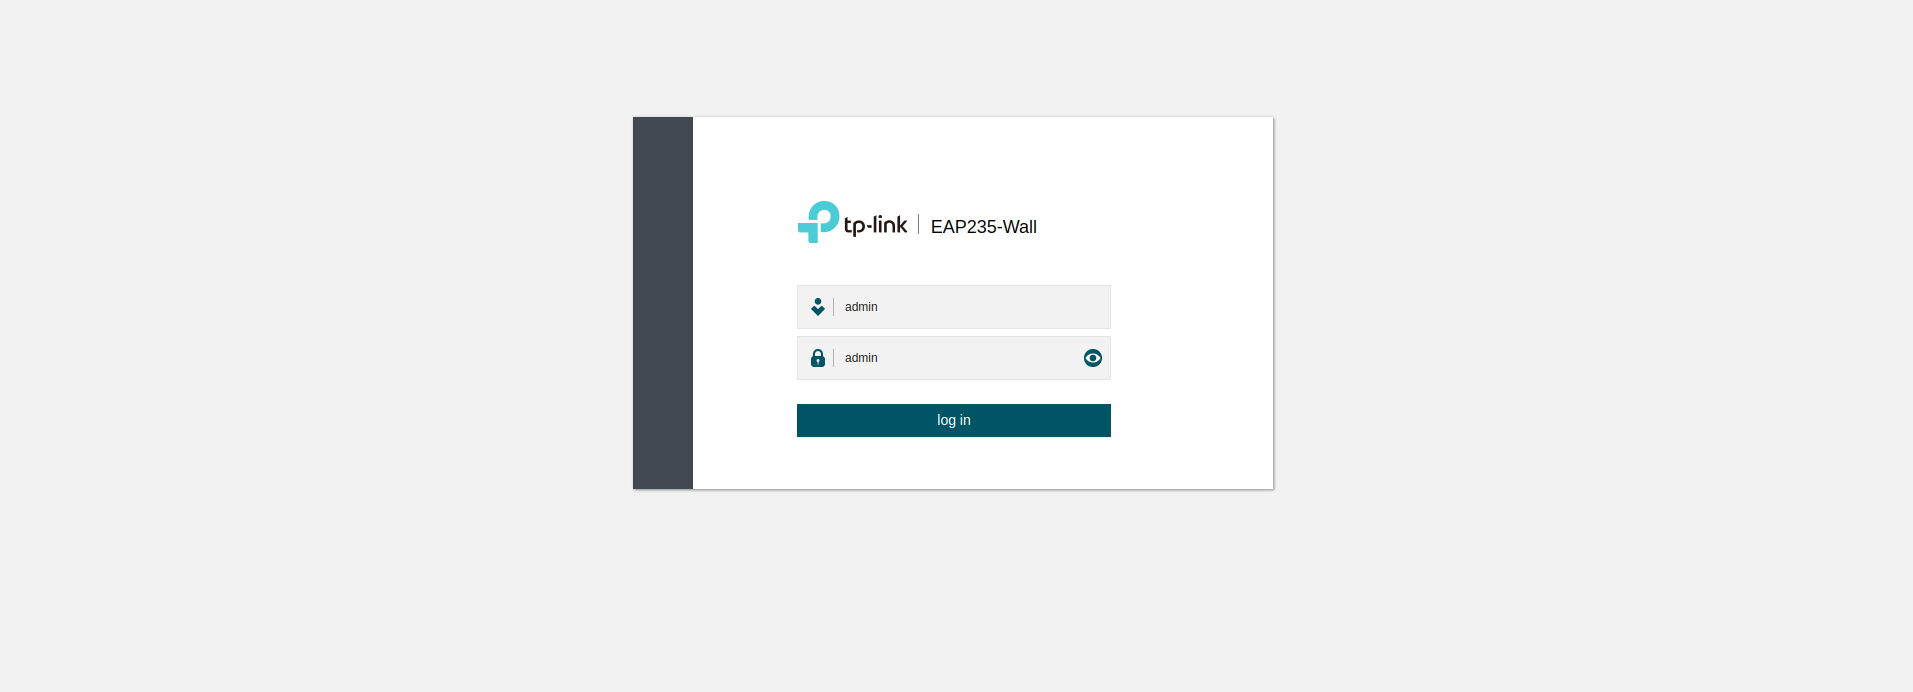
In the above example, we are using an EAP235-Wall Access Point. The defaults on all devices are:
Username: admin
Password: admin
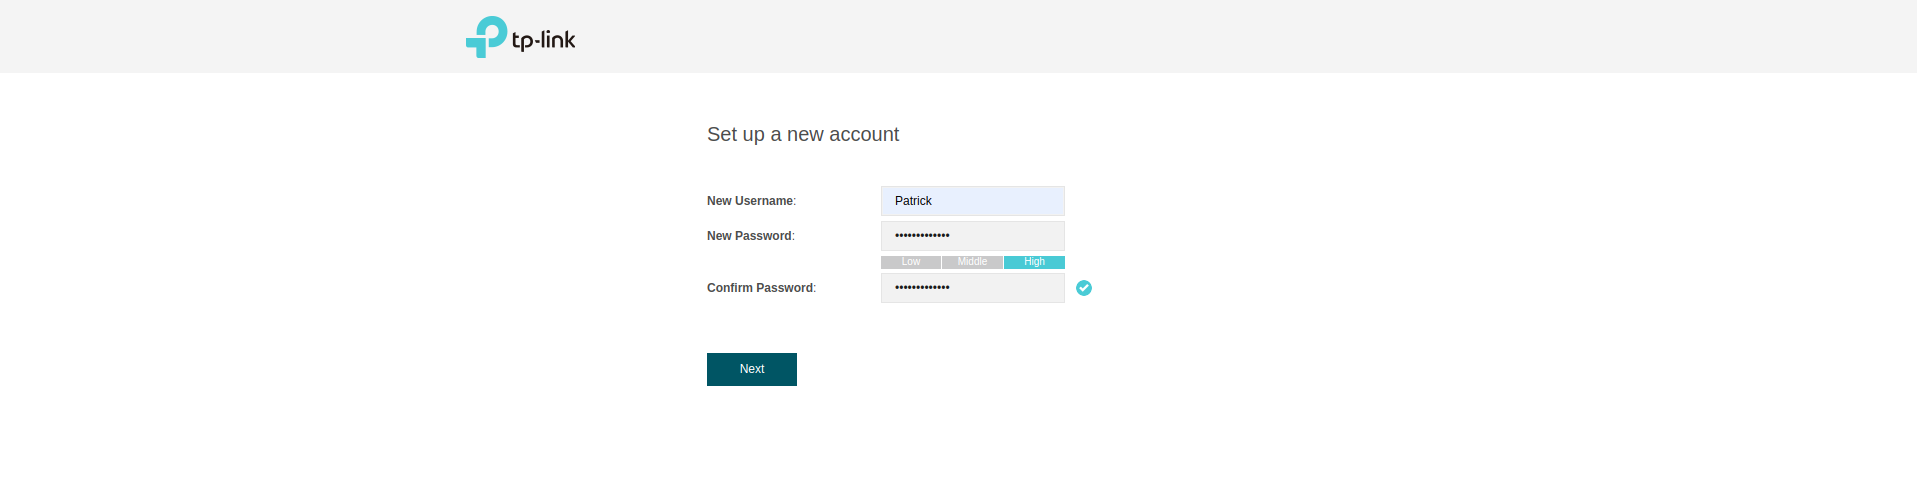
After logging in, you will be invited to change these defaults. Set a username and password according to your settings in the Omada controller. . .
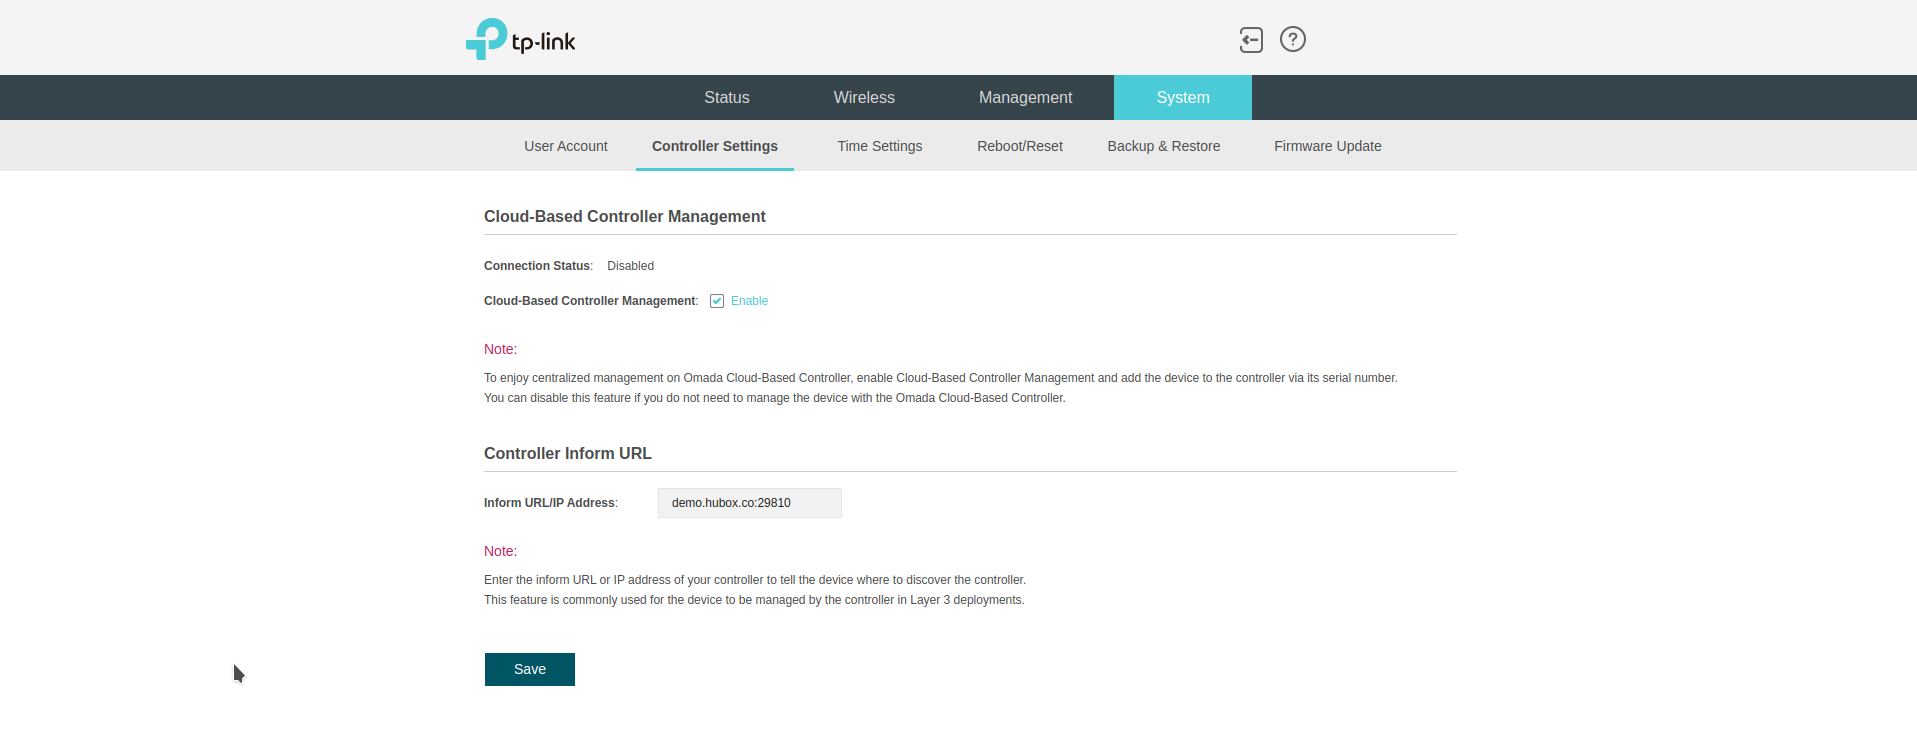
Go to System --> Controller Settings. Here you can set the address and port of your own controller. Be sure to also check the 'Cloud Based Controller Management' box. . .
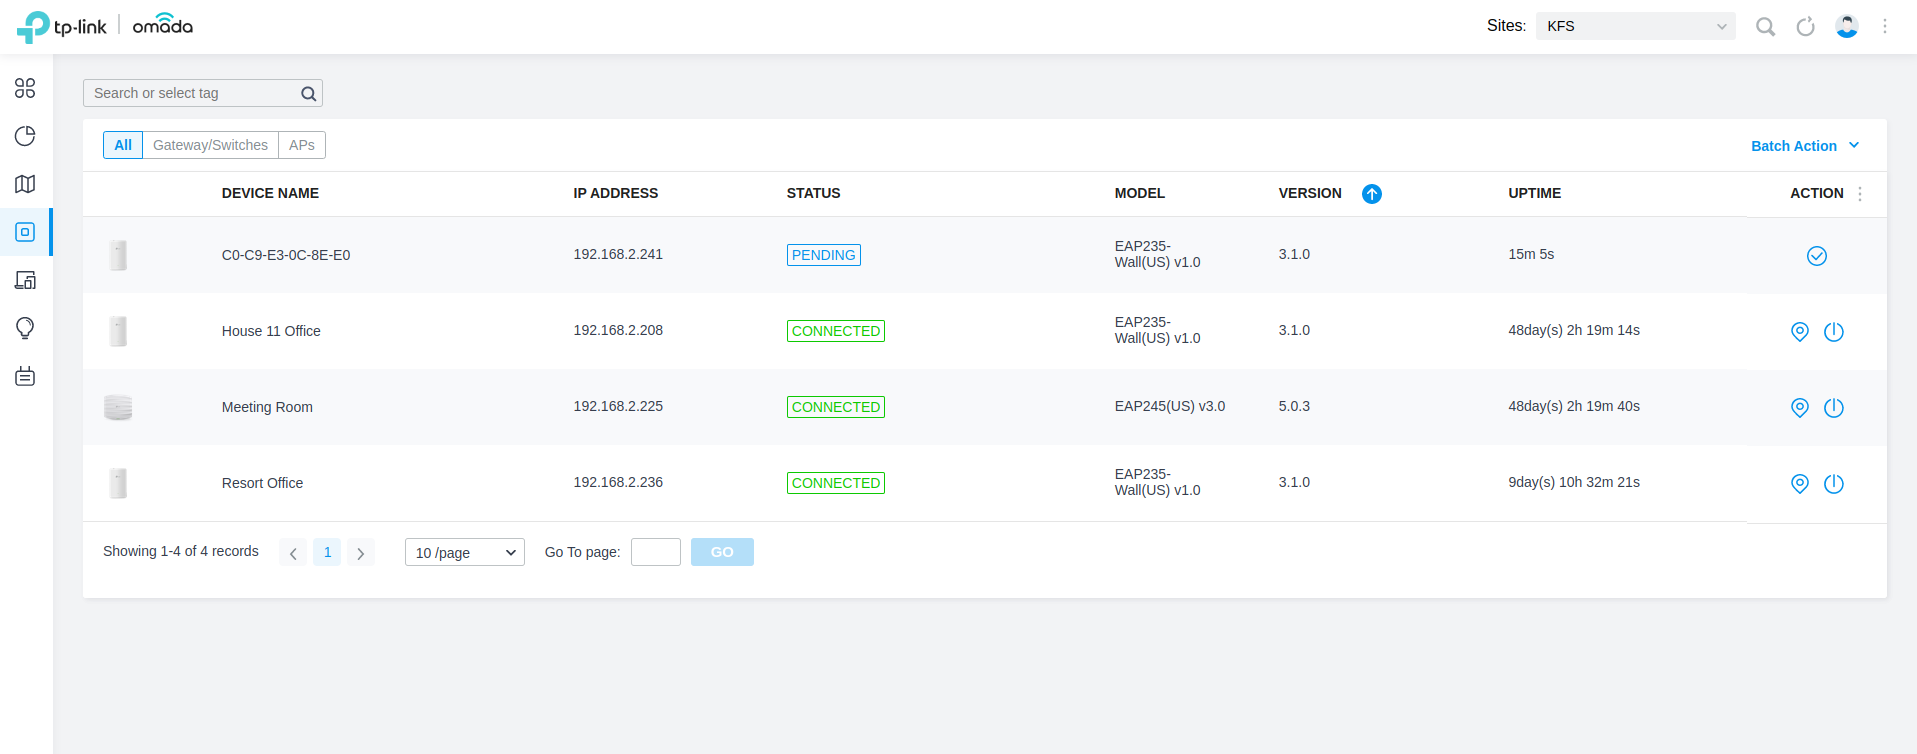
Afterward clicking save, you should almost immediately see the device appear in your controller in a 'PENDING' state, like so. . .
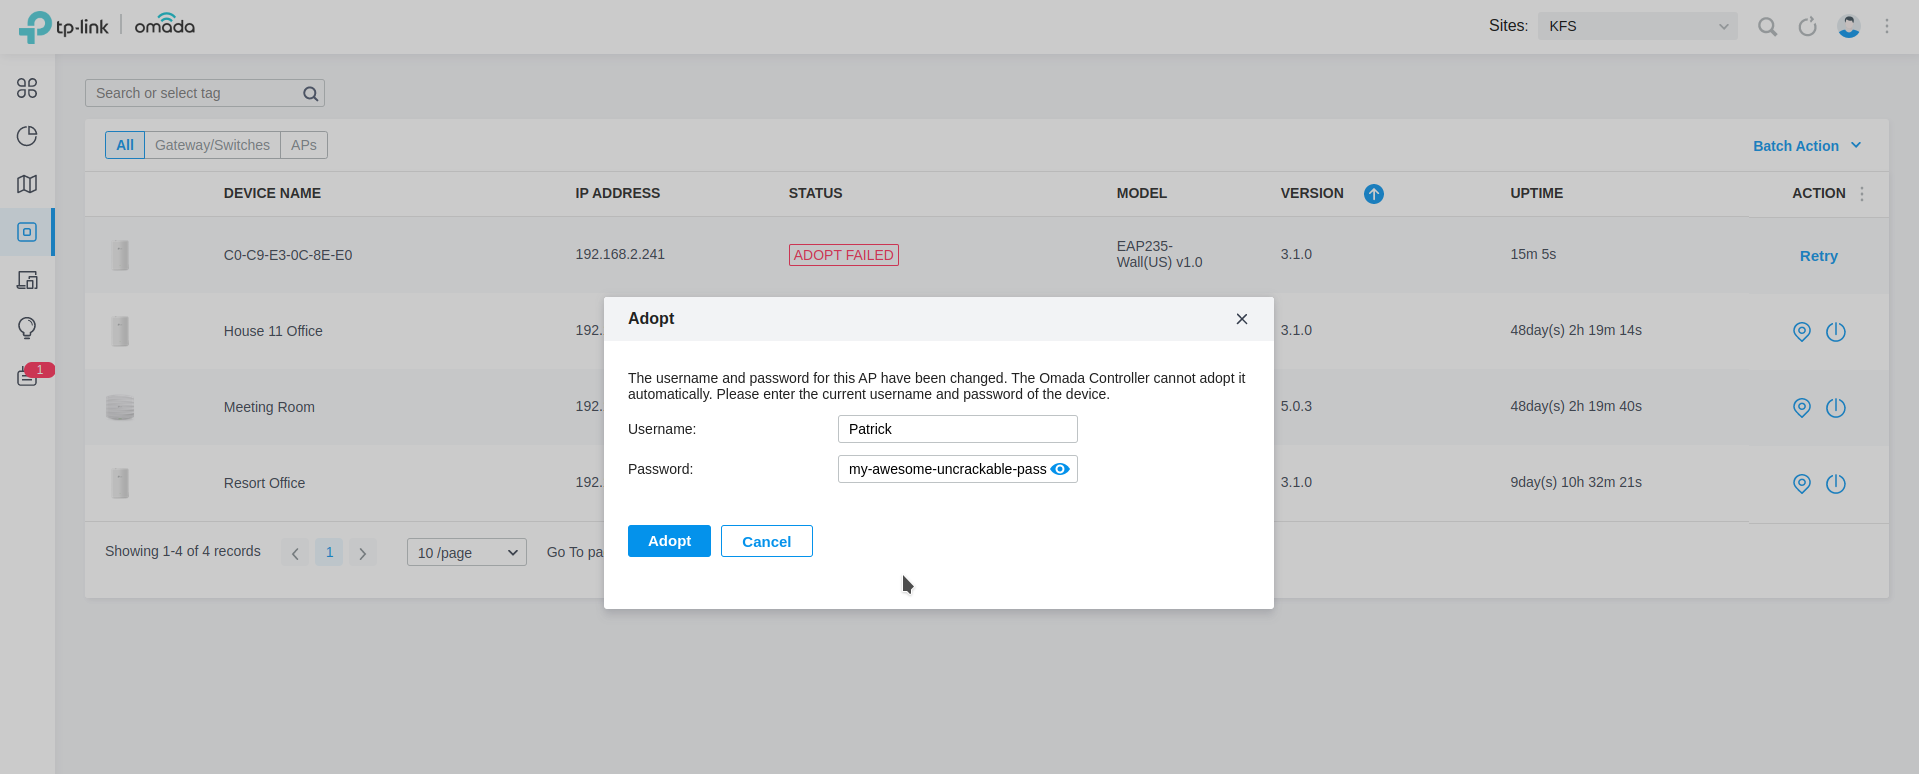
It should be obvious what to do next, but if the adoption fails, you will have the opportunity to set the password used a couple of steps above, like so. . .
Assuming all goes well, the device is adopted, converted from Standalone mode to Omada mode, report 'PROVISIONING' state, and the become fully configurable from within your controller.
Adopting devices using the Omada Discovery Utility
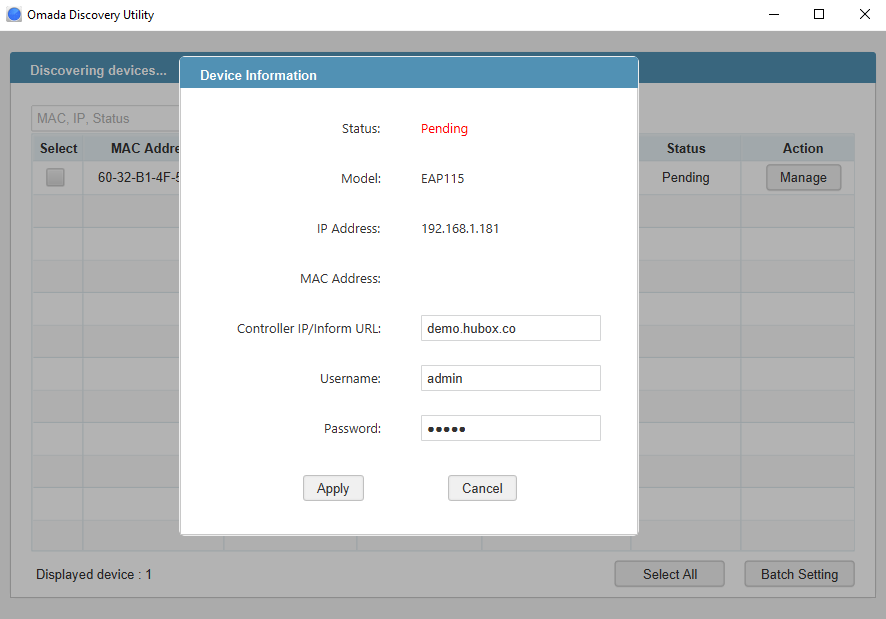
Plug in the Omada device. Navigate to the Omada Discovery Utility’s user interface, where you shall see devices on the local network listed. Click “Manage”:
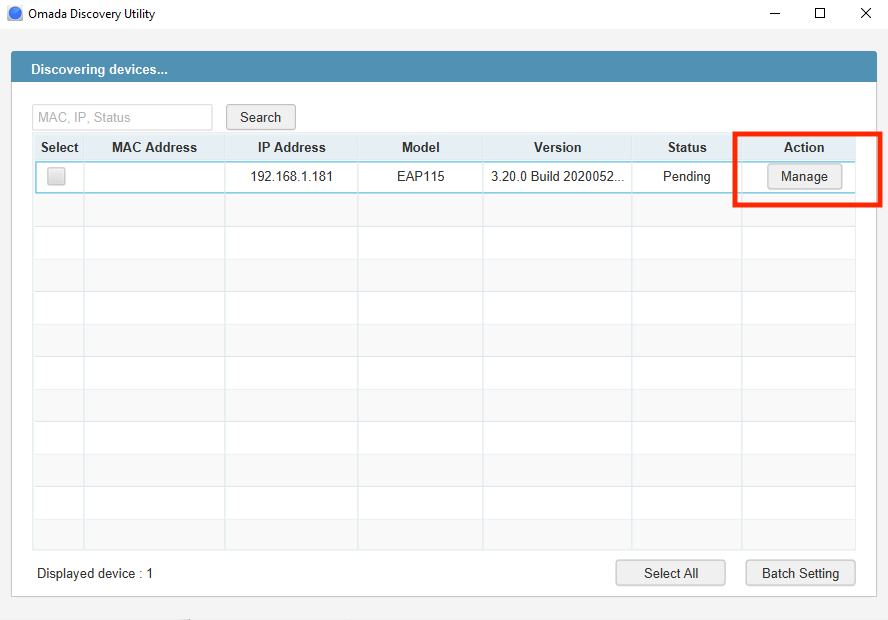
You will be presented with device options. Enter your controller’s Access URL, and the device username/password credentials (these credentials will be admin/admin, by default):
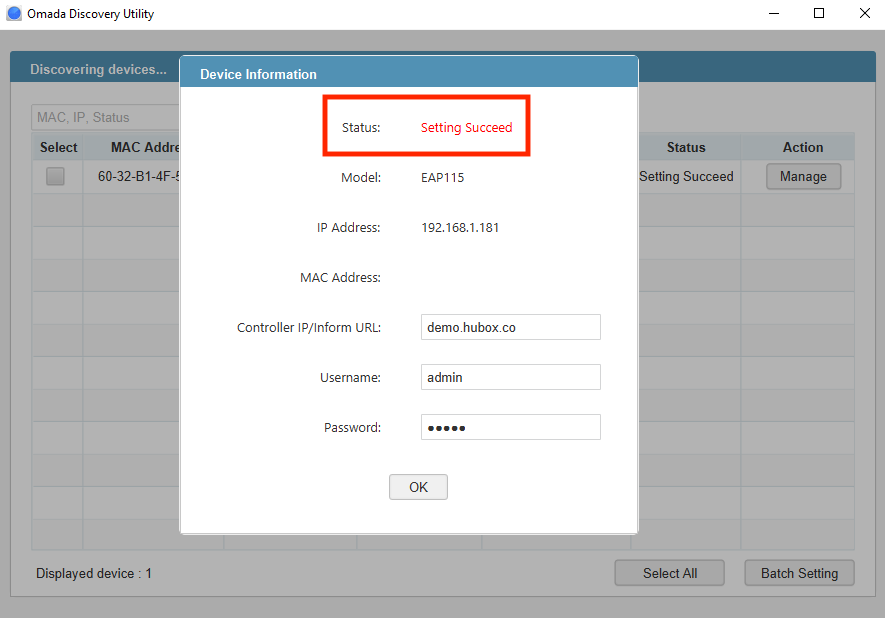
Click “Apply”. You shall see the ‘Pending’ status change to ‘Setting Succeed’. The device will then appear in the Devices tab within your Cloud controller, pending adoption into a site.
Adopting devices via the Omada smartphone app
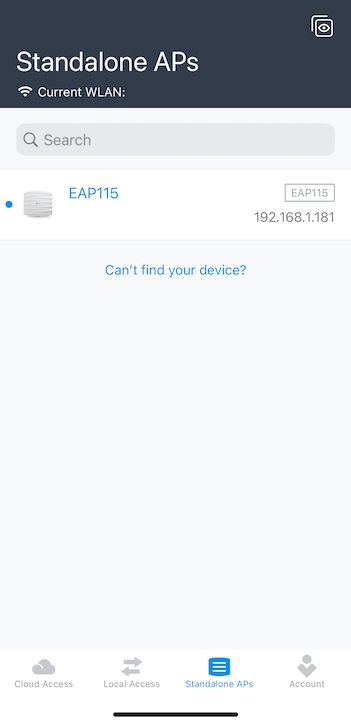
Open the Omada smartphone application and navigate to the Standalone APs tab. Click on the device, going through the standalone AP setup, if required:
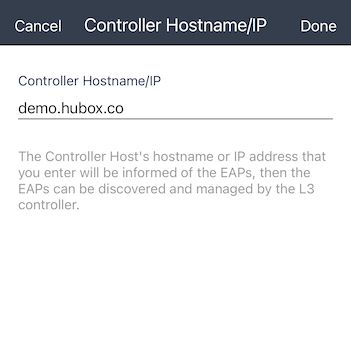
Navigate to the Controller Hostname/IP tab:
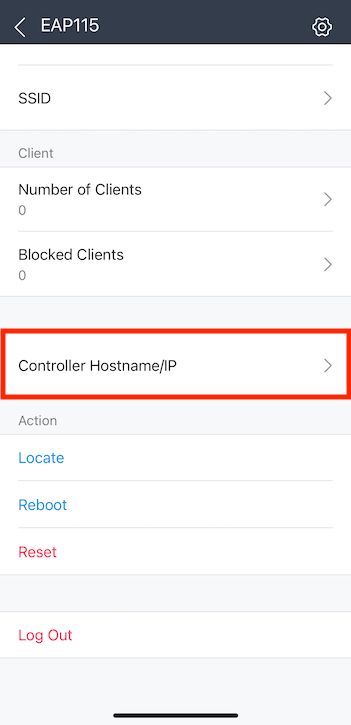
Input your Hubox controller’s Access URL (the controller’s IP will also work), then press “Done”. The device will then appear in the Devices tab within your Cloud controller, pending adoption into a site.